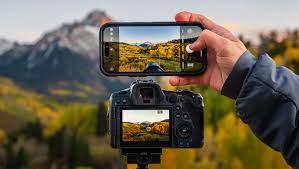
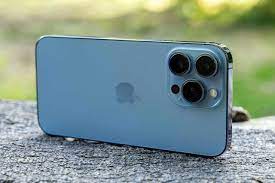
You may think that capturing stunning photos requires an expensive DSLR camera and years of experience. However, you’ll be surprised to discover that your iPhone is capable of producing breathtaking images.
By optimizing the camera settings and mastering the art of composition, you can elevate your photography skills to new heights. But how exactly do you do that?
In this discussion, we will unravel the secrets behind optimizing your iPhone’s camera settings. We’ll start by adjusting exposure for perfect lighting and then move on to exploring advanced features that will unleash your creativity.
Get ready to unlock the full potential of your iPhone and capture photos that will leave everyone in awe.
Understanding the Camera App Interface
To better navigate the Camera App interface on your iPhone, familiarize yourself with its various features and functions.
The Camera App on your iPhone is designed to make capturing memories easy and enjoyable. When you open the app, you’ll see a simple interface with a viewfinder in the center and a few icons at the bottom.
The most important icon is the shutter button, located at the bottom center of the screen. This is what you’ll press to take a photo. On either side of the shutter button, you’ll find icons for different shooting modes, such as Photo, Video, Square, and Pano. These modes allow you to choose the best format for your desired outcome.
Above the shutter button, you’ll see options for flash, HDR, and Live Photos. These features enhance the quality and creativity of your photos. Additionally, there are icons for switching between the front and rear cameras, adjusting exposure, and applying filters.
Adjusting Exposure for Perfect Lighting
Adjust the exposure settings on your iPhone camera to ensure optimal lighting for your photos. By adjusting the exposure, you can control the brightness and darkness of your images, ensuring that the subject is properly lit and details are clearly visible.
To adjust the exposure, open the camera app and tap on the screen to focus on your subject. Once the focus is set, you’ll see a small sun icon next to the focus square. To adjust the exposure, swipe up or down on the screen while keeping your finger on the sun icon. Swiping up will increase the exposure, making the image brighter, while swiping down will decrease the exposure, making the image darker.
Take some time to experiment with different exposure settings to find the perfect balance of light and shadow for your photos. Remember, adjusting the exposure can greatly enhance the overall look and feel of your images, so don’t be afraid to play around and get creative with your iPhone camera settings.
Utilizing HDR Mode for High-Contrast Scenes
Enhance the quality of your photos in high-contrast scenes by utilizing the HDR mode on your iPhone camera. HDR, or High Dynamic Range, mode is a powerful feature that allows you to capture stunning images in situations where there’s a wide range of light intensities.
When enabled, your iPhone will take multiple shots at different exposures and then combine them into a single photo with optimized lighting and detail.
To use HDR mode, simply open the Camera app on your iPhone and tap on the HDR button at the top of the screen. It’s represented by a small icon that looks like a sun. When HDR is activated, the camera will automatically capture a series of photos with different exposure levels. You don’t need to worry about holding the camera still, as the iPhone will align and merge the images seamlessly.
HDR mode is particularly useful in high-contrast scenes, where there are bright highlights and deep shadows. It helps to balance out these extremes and capture more detail in both the bright and dark areas of the image. This can result in photos that are more vibrant and true to life.
Keep in mind that HDR mode may not be suitable for all situations. It works best when there’s minimal movement in the scene, as any motion can cause blurring in the final image. Additionally, HDR photos can take a bit longer to process, so it’s important to be patient while your iPhone works its magic.
Mastering Portrait Mode for Professional-Looking Portraits
Immerse yourself in the world of professional-looking portraits with the mastery of Portrait Mode on your iPhone camera. This feature allows you to capture stunning portraits with a beautifully blurred background, making your subject stand out.
To achieve the best results, start by finding the right lighting. Natural light is ideal, as it brings out the true colors and details of your subject. Avoid harsh sunlight or shadows, as they can create unflattering effects.
Once you have the perfect lighting, position your subject in a way that highlights their best features. Consider the angle, composition, and focus to create a visually pleasing image. Experiment with different poses and expressions to capture their personality. Don’t be afraid to get up close and personal, as Portrait Mode excels in capturing intricate details.
Lastly, make use of the editing tools available on your iPhone to enhance your portraits further. Adjust the brightness, contrast, and saturation to bring out the true essence of your subject.
With practice and experimentation, you can master Portrait Mode and create professional-looking portraits that will impress everyone who sees them.
Exploring Advanced Camera Settings for Creative Control
Now that you have mastered Portrait Mode for professional-looking portraits, it’s time to take your iPhone camera skills to the next level by exploring the advanced camera settings that give you creative control. With these settings, you can unlock your artistic potential and capture stunning photos that truly stand out.
One of the advanced camera settings you should explore is Manual Focus. This allows you to manually adjust the focus point of your photo, giving you precise control over what you want to highlight. Whether it’s a close-up of a flower or a distant landscape, you can bring your subject into sharp focus and create a visually captivating image.
Another setting to experiment with is Exposure Compensation. This feature allows you to adjust the exposure of your photo, making it brighter or darker depending on your preference. This can be particularly useful when dealing with high contrast scenes, such as a sunset or a backlit subject. By fine-tuning the exposure, you can ensure that the details in both the highlights and shadows are well-preserved.
Lastly, don’t forget to explore the White Balance setting. This allows you to adjust the color temperature of your photo, giving it a warmer or cooler tone. By playing around with this setting, you can add a creative touch to your photos and evoke different moods.
Conclusion
Now that you’ve learned how to optimize your iPhone camera settings, you can capture stunning photos like a pro.
Understanding the camera app interface, adjusting exposure, utilizing HDR mode, and mastering portrait mode will all contribute to creating professional-looking shots.
Don’t forget to explore the advanced camera settings for even more creative control.
With these tips, your iPhone will become a powerful tool for capturing beautiful moments.


